> For the complete documentation index, see [llms.txt](https://monet-society.gitbook.io/cardano/llms.txt). Markdown versions of documentation pages are available by appending `.md` to page URLs; this page is available as [Markdown](https://monet-society.gitbook.io/cardano/creator-guide/how-to-launch-an-nft-collection/how-to-start-minting-nfts/mint-your-nft.md).
# Mint Your NFT
With your funded wallet ready to transact, it’s time to start minting NFTs! For the purpose of this guide, we’re going to take you through the NFT minting process to mint a single NFT using JPG Store step by step and list your NFT on its marketplace.\
\
**1. Connect to Eternl’s DApp Browser.**\
****\
Eternl has a built-in browser that lets you connect to Cardano dApps (decentralized applications) directly from your new wallet.\
\
**Click on ‘DApp Browser’** at the bottom left-hand side of your wallet’s dashboard.\
\
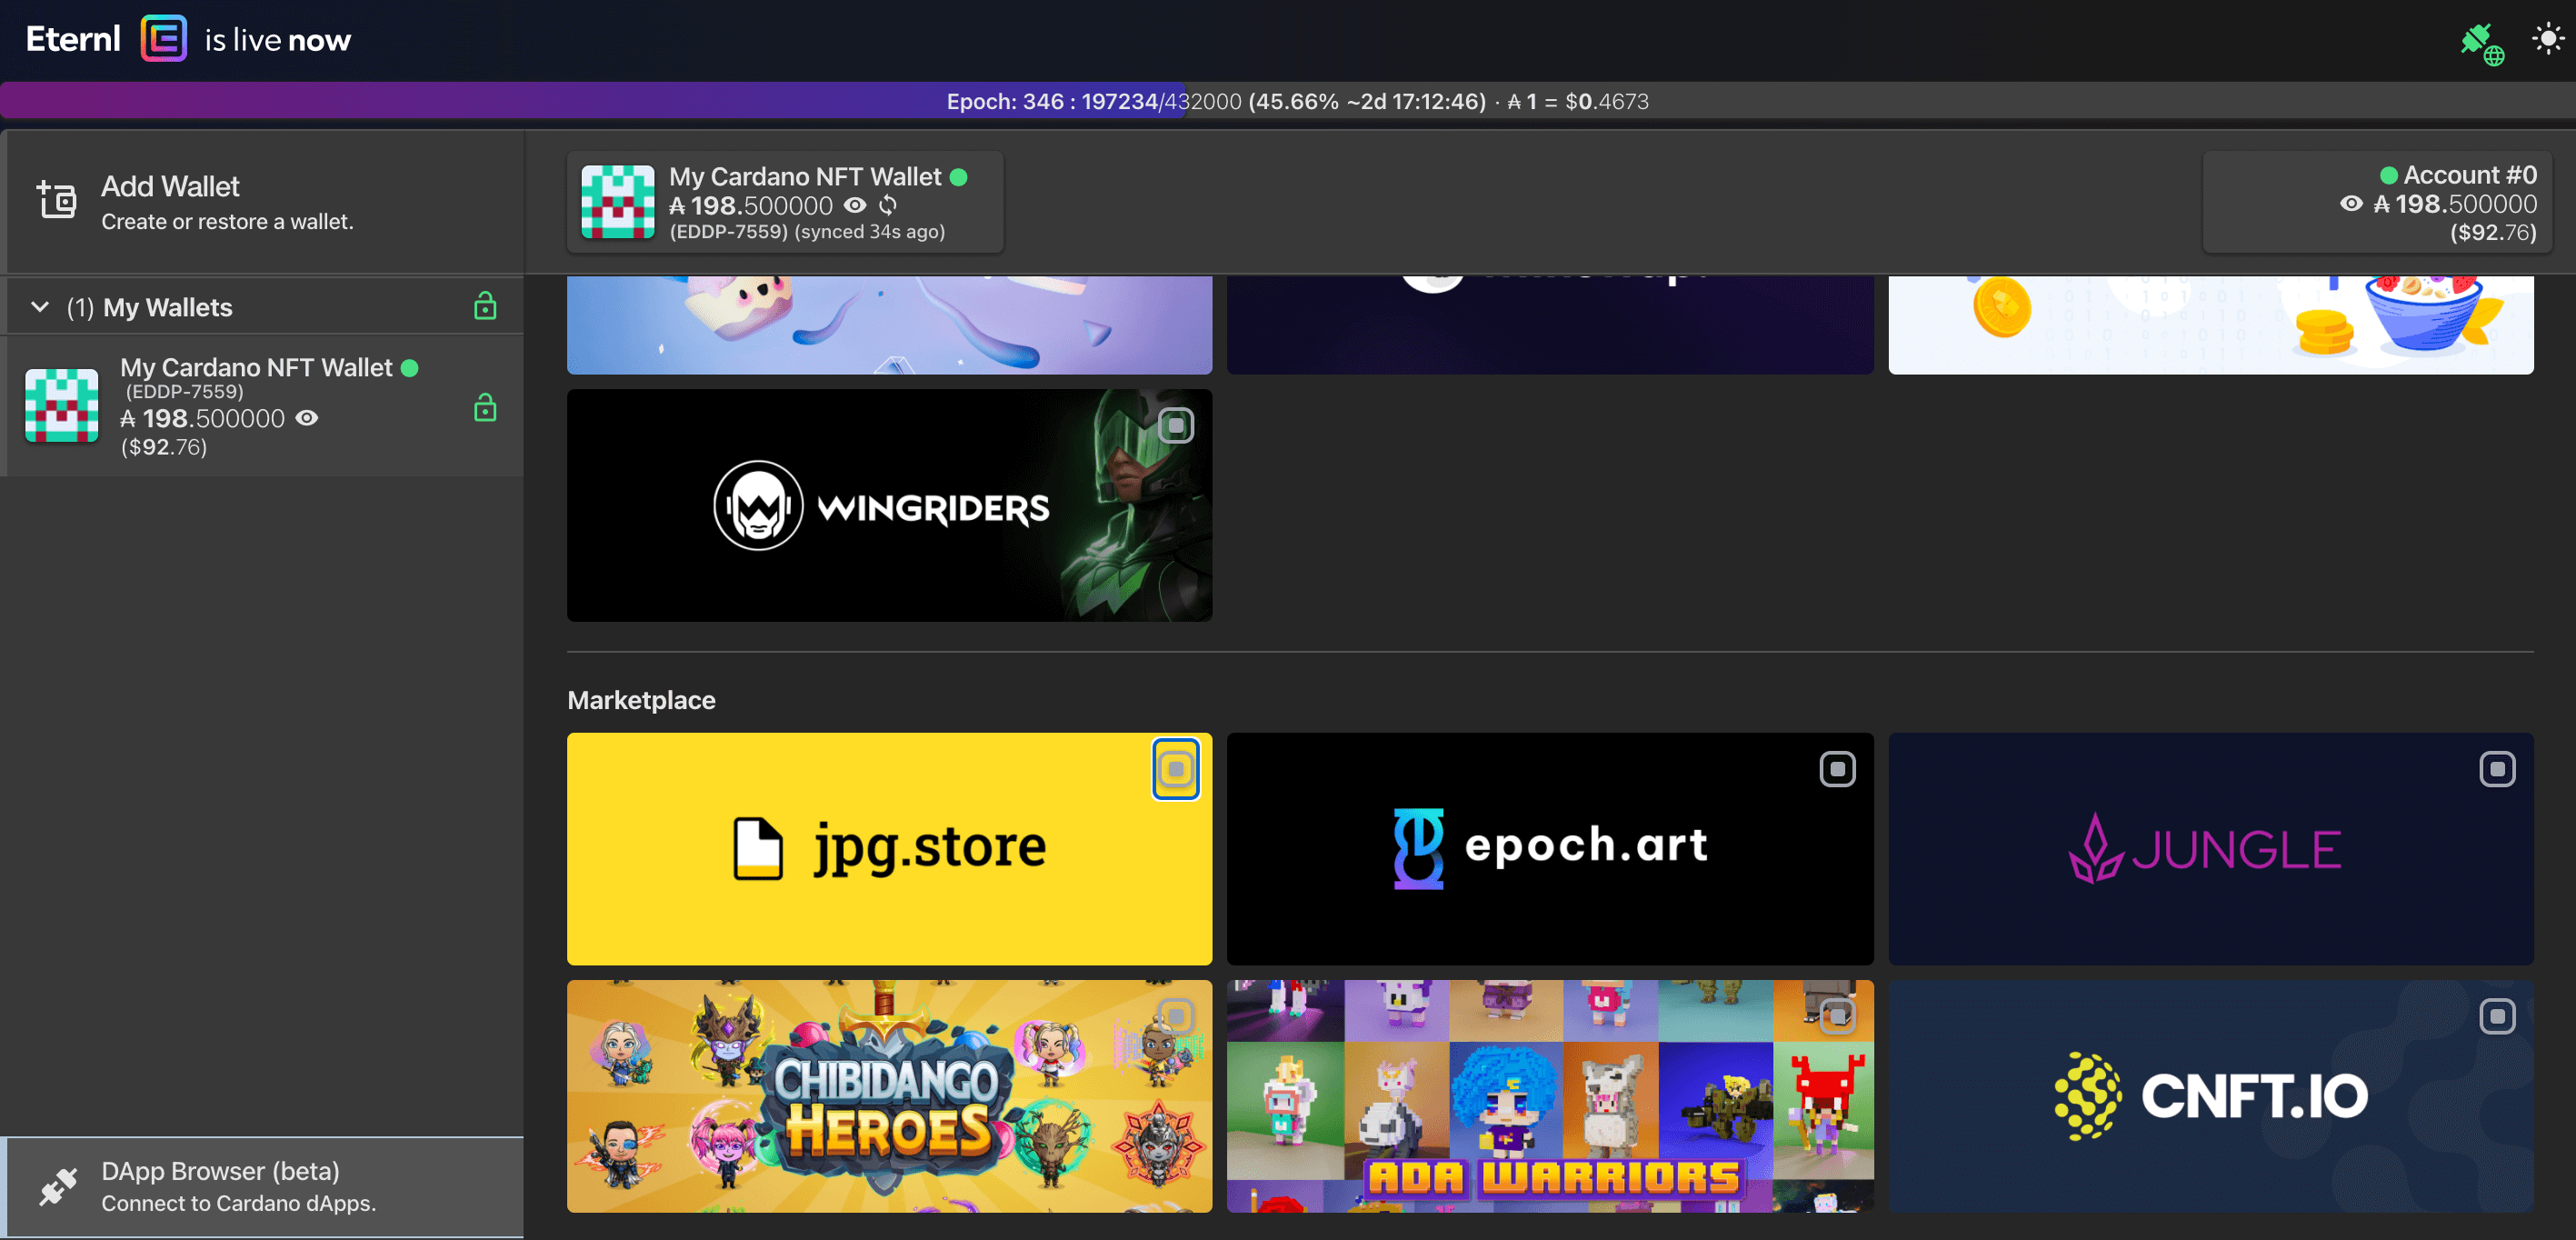
**2. Scroll down to Marketplace and click on ‘jpg.store.’**\
****
\
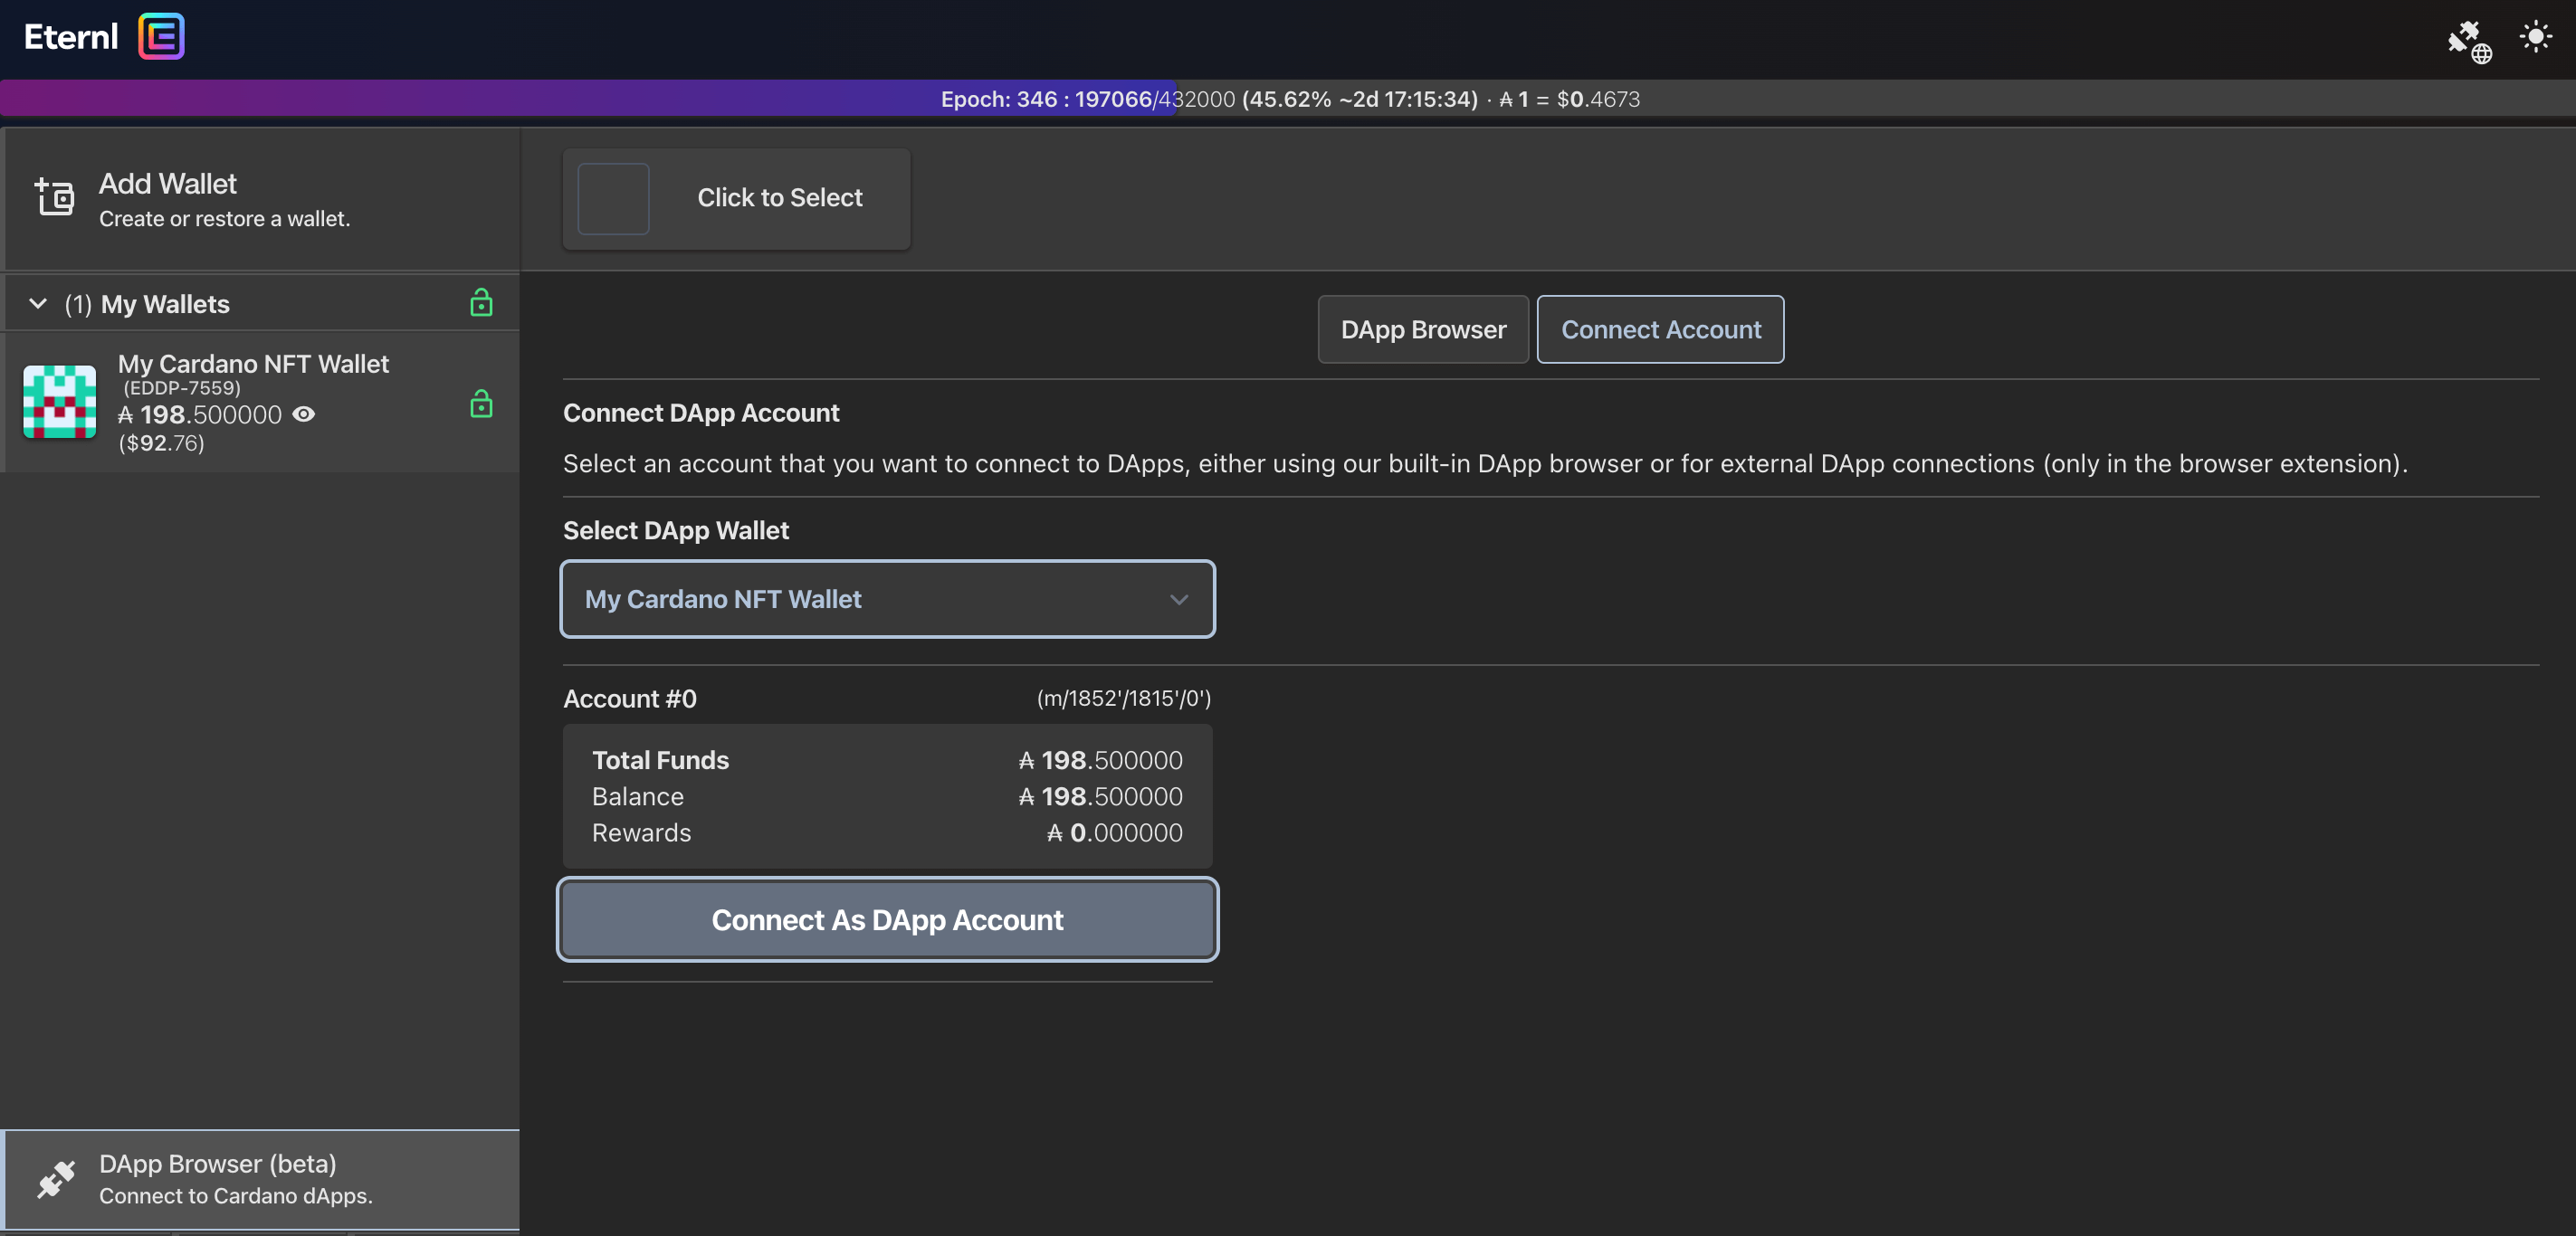
**3. Click on ‘Connect As DApp Account.’**\
****
\
**4. Click back to the ‘DApp Browser’ at the top and click the box icon on jpg.store.**\
****
\
**5. Once the site has loaded, click on the yellow ‘Connect Wallet’ button and select Eternl.**\
****
\
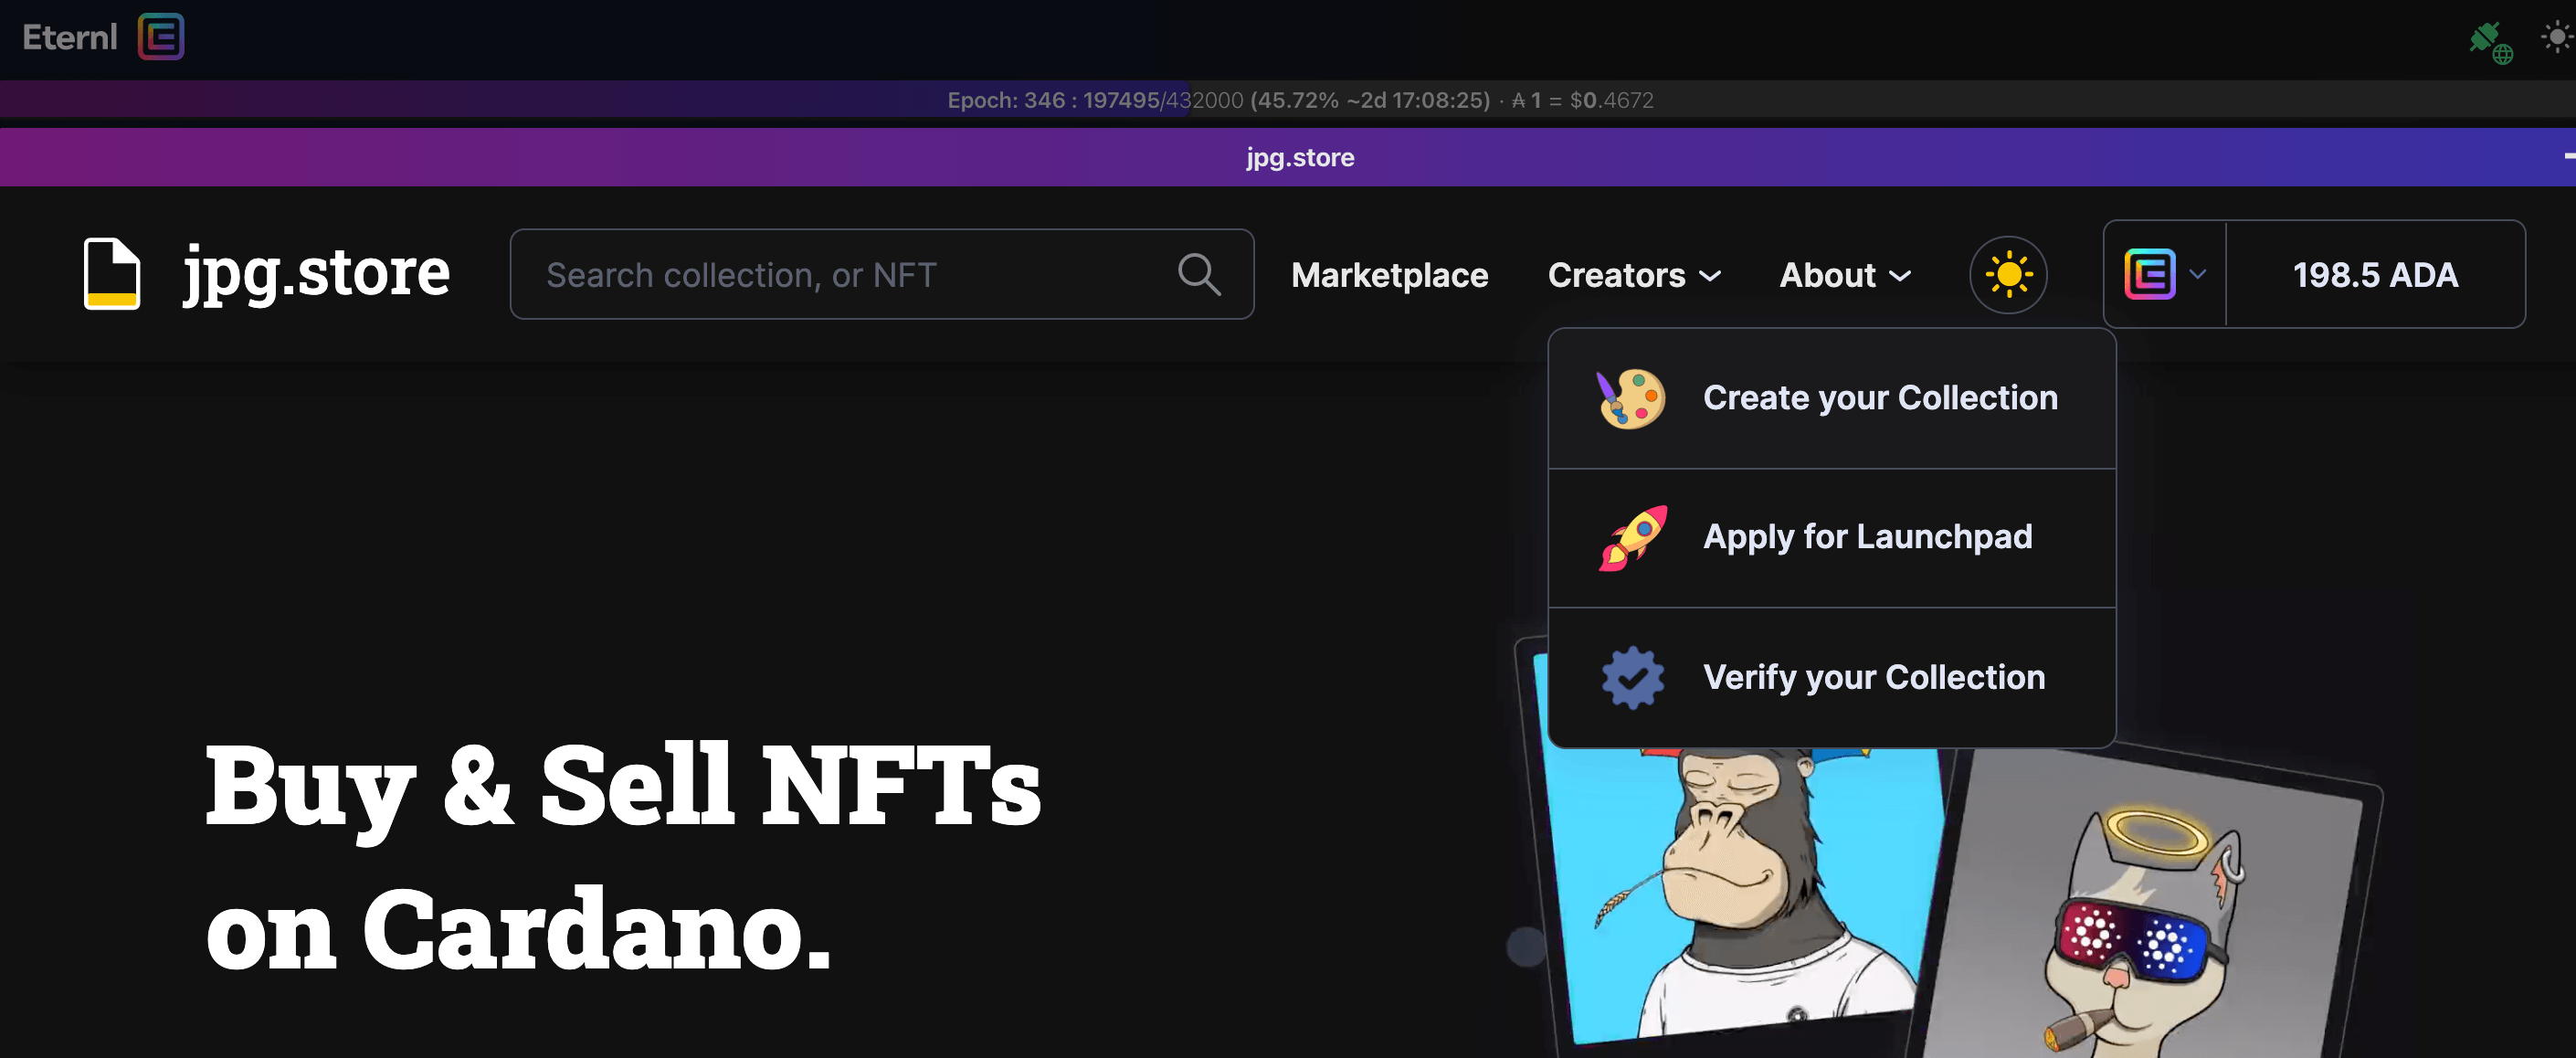
**6. Click the ‘Creators’ dropdown menu at the top and select ‘Create Your Own Collection.’**\
****
\
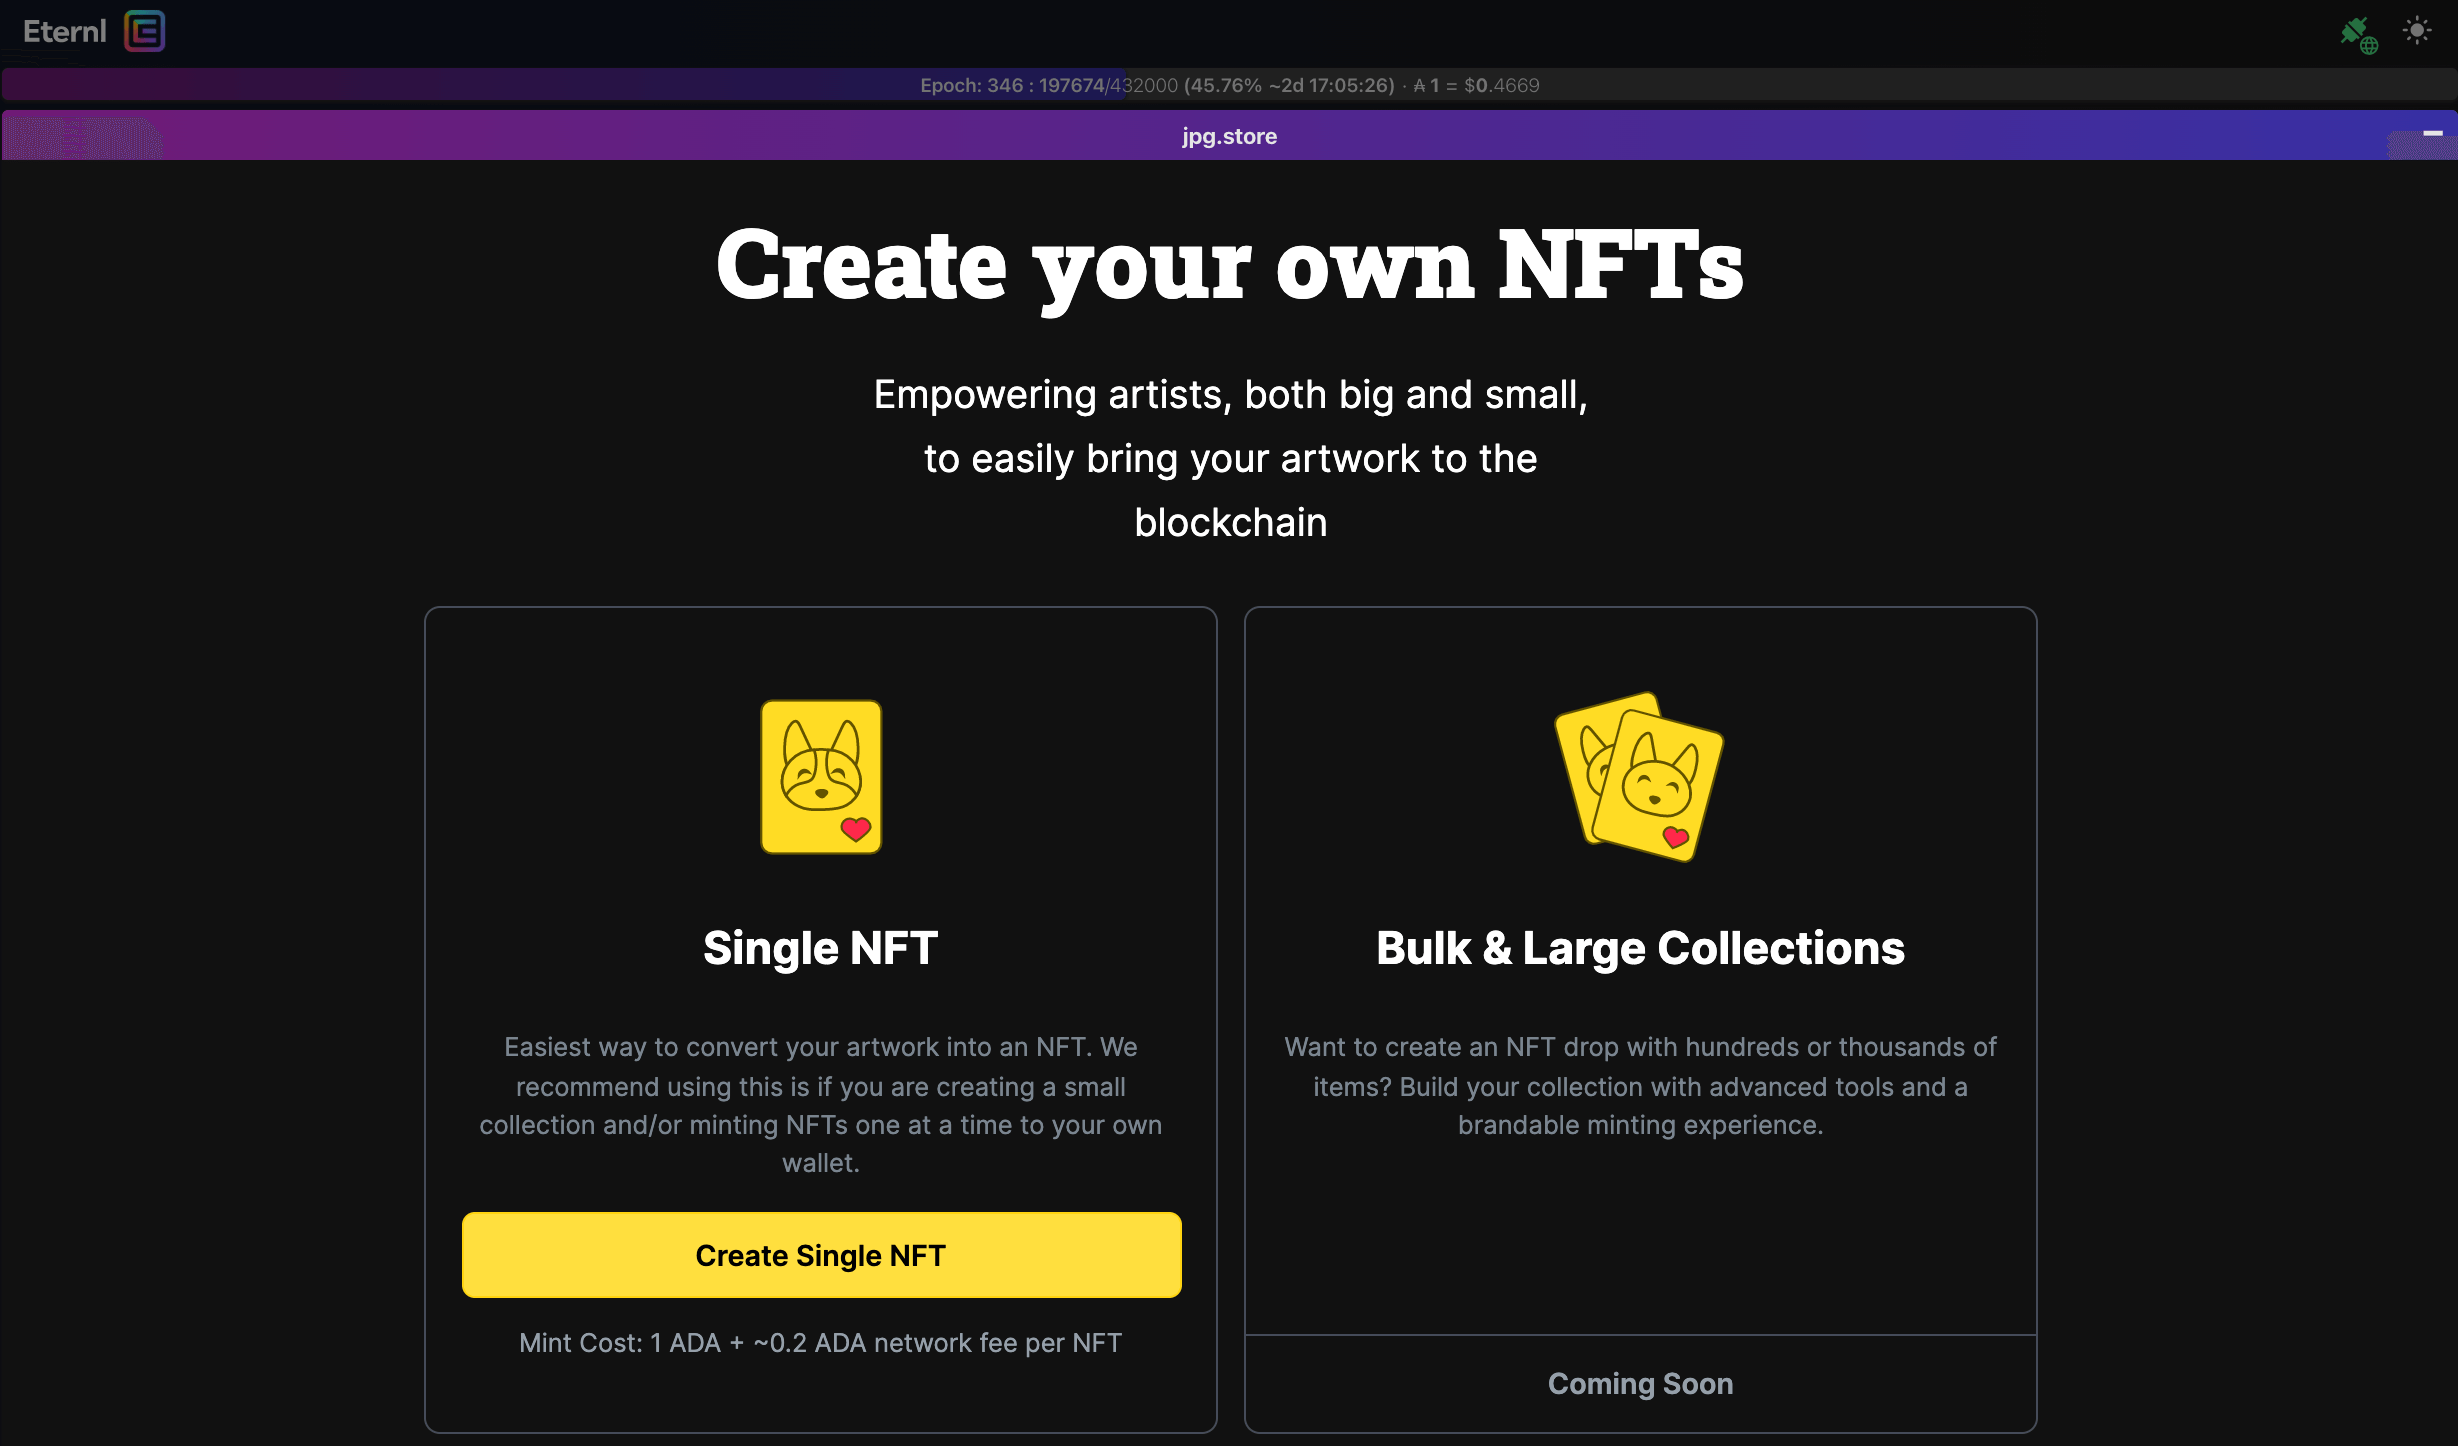
**7. Click on ‘Create Single NFT.’**\
****
\
**8. Click on ‘Create New Policy ID.’**\
****
\
Your Cardano NFT policy ID is essentially the ID under which all NFTs in a single collection will live. It’s the ID that proves that you are the original owner of the artwork in your collection, and it gives buyers a way to verify your collection when they’re considering buying your NFTs.\
\
Once you’ve created your new policy ID and first NFT, you’ll be able to add more NFTs to this specific collection later.****
\
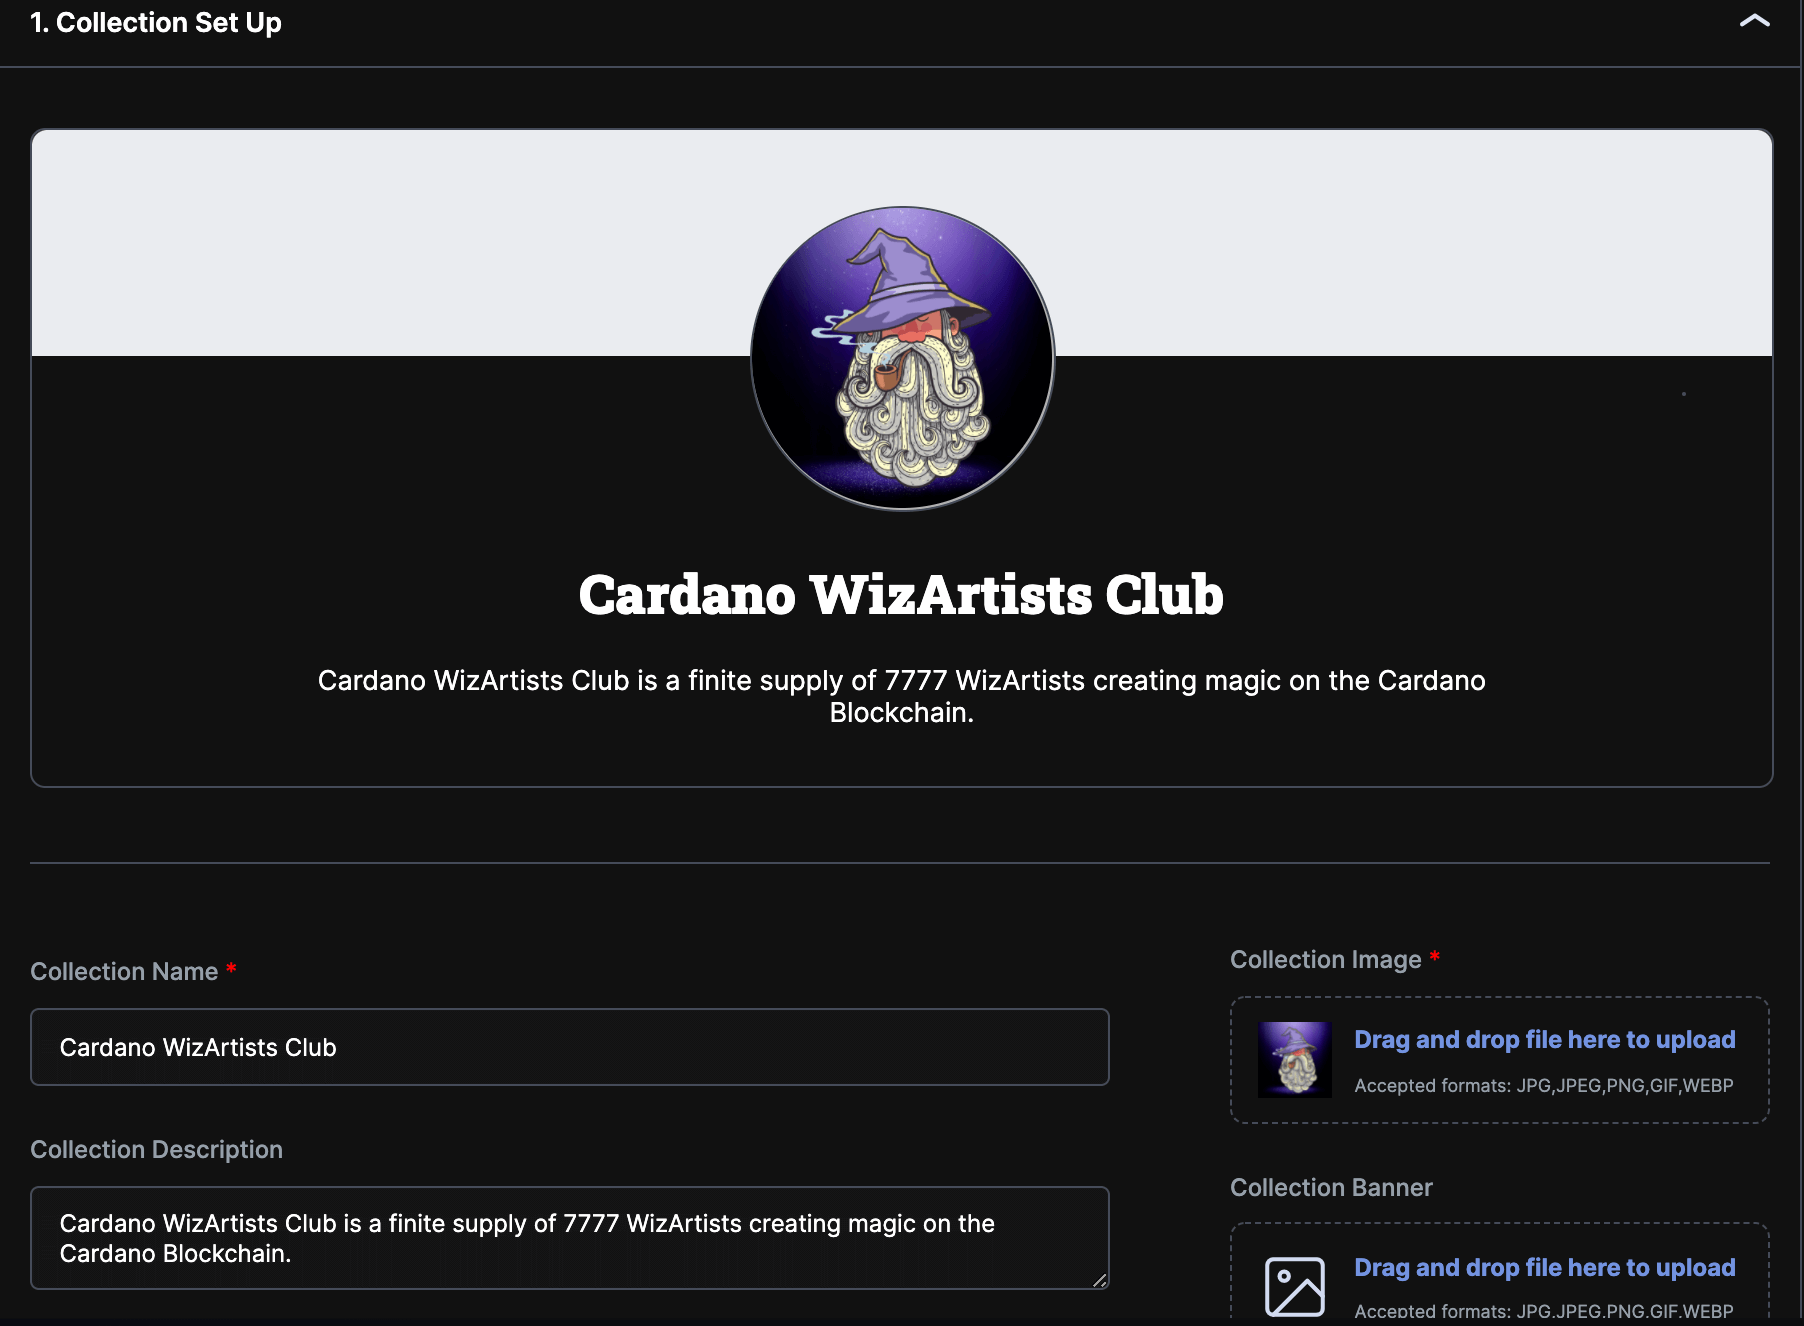
**9. Add Information About Your Collection**\
****
In this section you’ll be creating your collection page and including:\
\
\- **Your collection image, name, and description**\
\
****Add an image of the artwork that is going to represent your greater collection. There is also an option to include a banner for your collection, but it is not required. For the description, you should include details like the story behind your art, how it is created, the total supply, and what (if any) perks buyers can expect e.g. a physical copy of the art with NFT purchases.\
\
Remember, you’re trying to stand out from everyone else here and get buyers interested, so take the time to think about everything that is special about your project.\
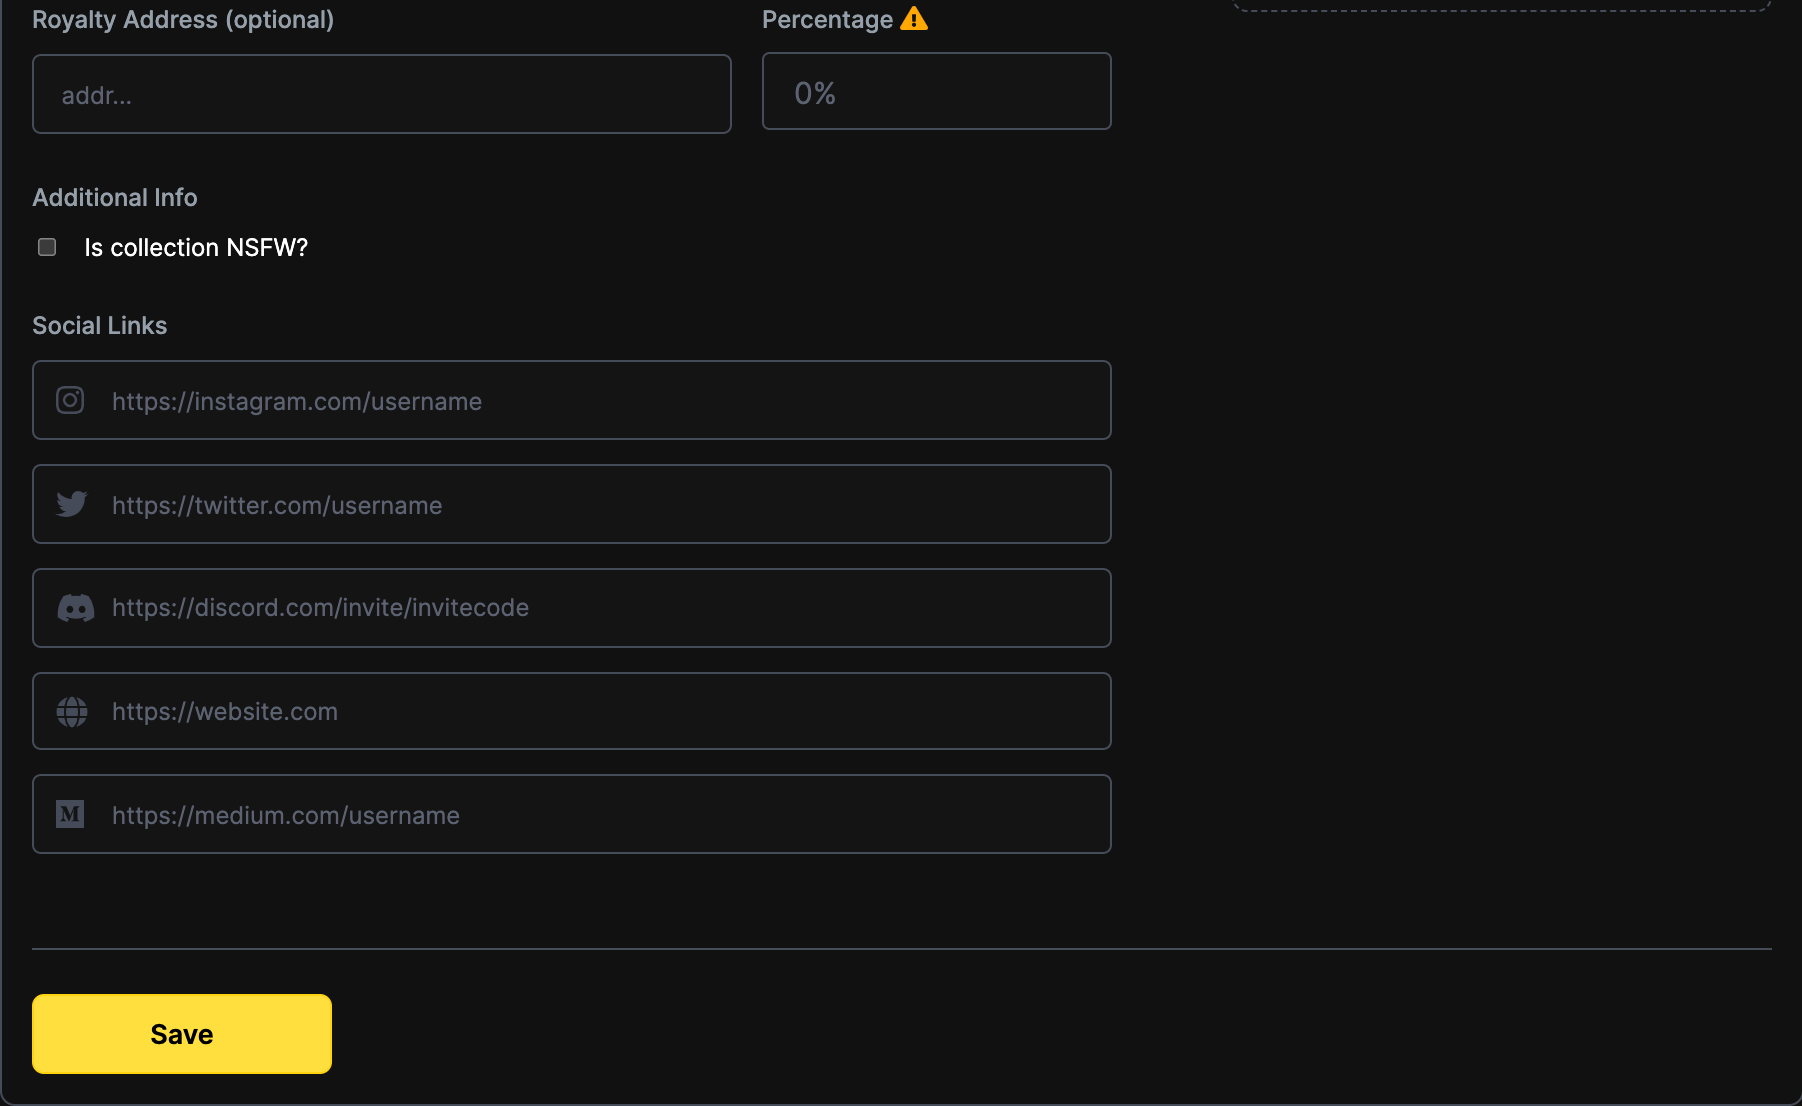
**- CNFT royalties**\
****\
As the original creator of your artwork, you are entitled to [**set royalties to earn a commission**](http://www.monetsociety.io/post/nft-royalties) through subsequent sales of your NFTs on the secondary market. Royalties are tracked on the blockchain and come in automatic payments from the marketplace that you list your NFT on when a sale occurs after the initial sale.\
\
Setting royalties can help you earn passive income for your artwork indefinitely, and might become a very profitable income stream if the resale value of your NFTs increases over time. It’s important to note that if you wish to add royalties to your collection, this is the place and time to do it. \
\
Go to your Eternl wallet and copy your Receive address and paste it into the Royalty Address field. The average NFT royalty percentage **typically ranges from 2.5-10%**, but ultimately the final decision rests with you.\
\
\* *Once you’ve set a royalty % for your collection you won’t be able to change it, so consider this wisely before moving ahead.*\
\&#xNAN;**\
\&#xNAN;**- Additional info and social links** \
****\
Check the box if the artwork in your collection is of an explicit nature and NSFW (not safe for work). Including social links is an important part of helping buyers to further verify your collection and identity and keep up to date on any project milestones.\
\
If you have a website or art portfolio link that you can share, it’s a good idea to add these as well. Twitter and Discord are the go-to social applications for building a community around your project and collection in the NFT and crypto space. \
\
Whilst Twitter can be used for bite-sized updates and promotional content around your collection, Discord is definitely better suited for collections/projects with massive followings as moderating by oneself can become a bit of a nightmare. \
\
Being active on these platforms is the key to generating awareness around your collection, but more on that in the marketing of your collection section below.\
\
With all your information checked and entered, **click the yellow ‘Save’ button**.\
\
\&#xNAN;**- Enter your wallet’s spending password and click ‘Sign.’**\
****
\
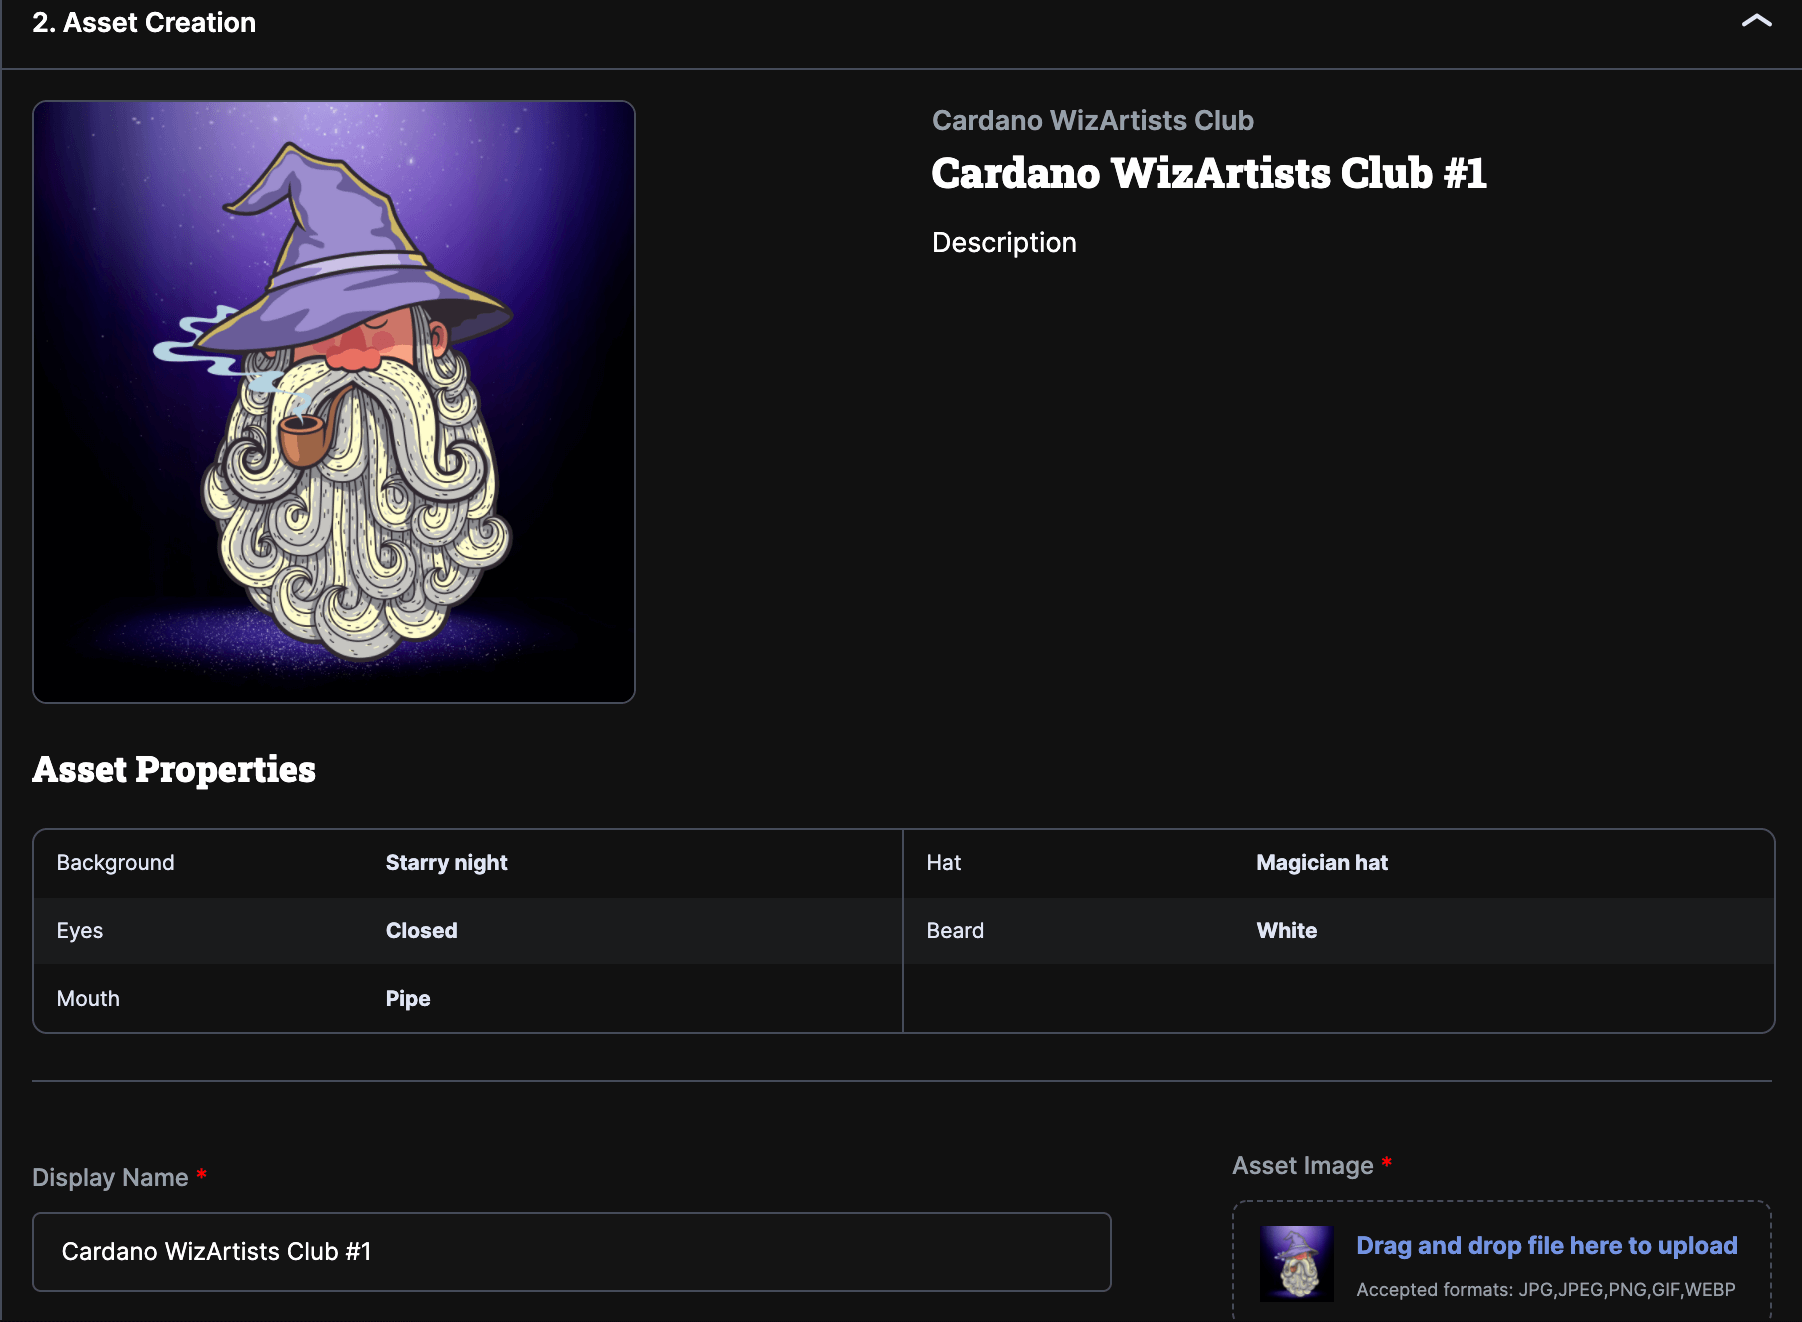
\- **Create your NFT**\
With your collection created, a policy ID is also created so that only your wallet can mint new NFTs to it. Now onwards to minting your NFT!\
\
Select the file you wish to upload as an NFT. \
\
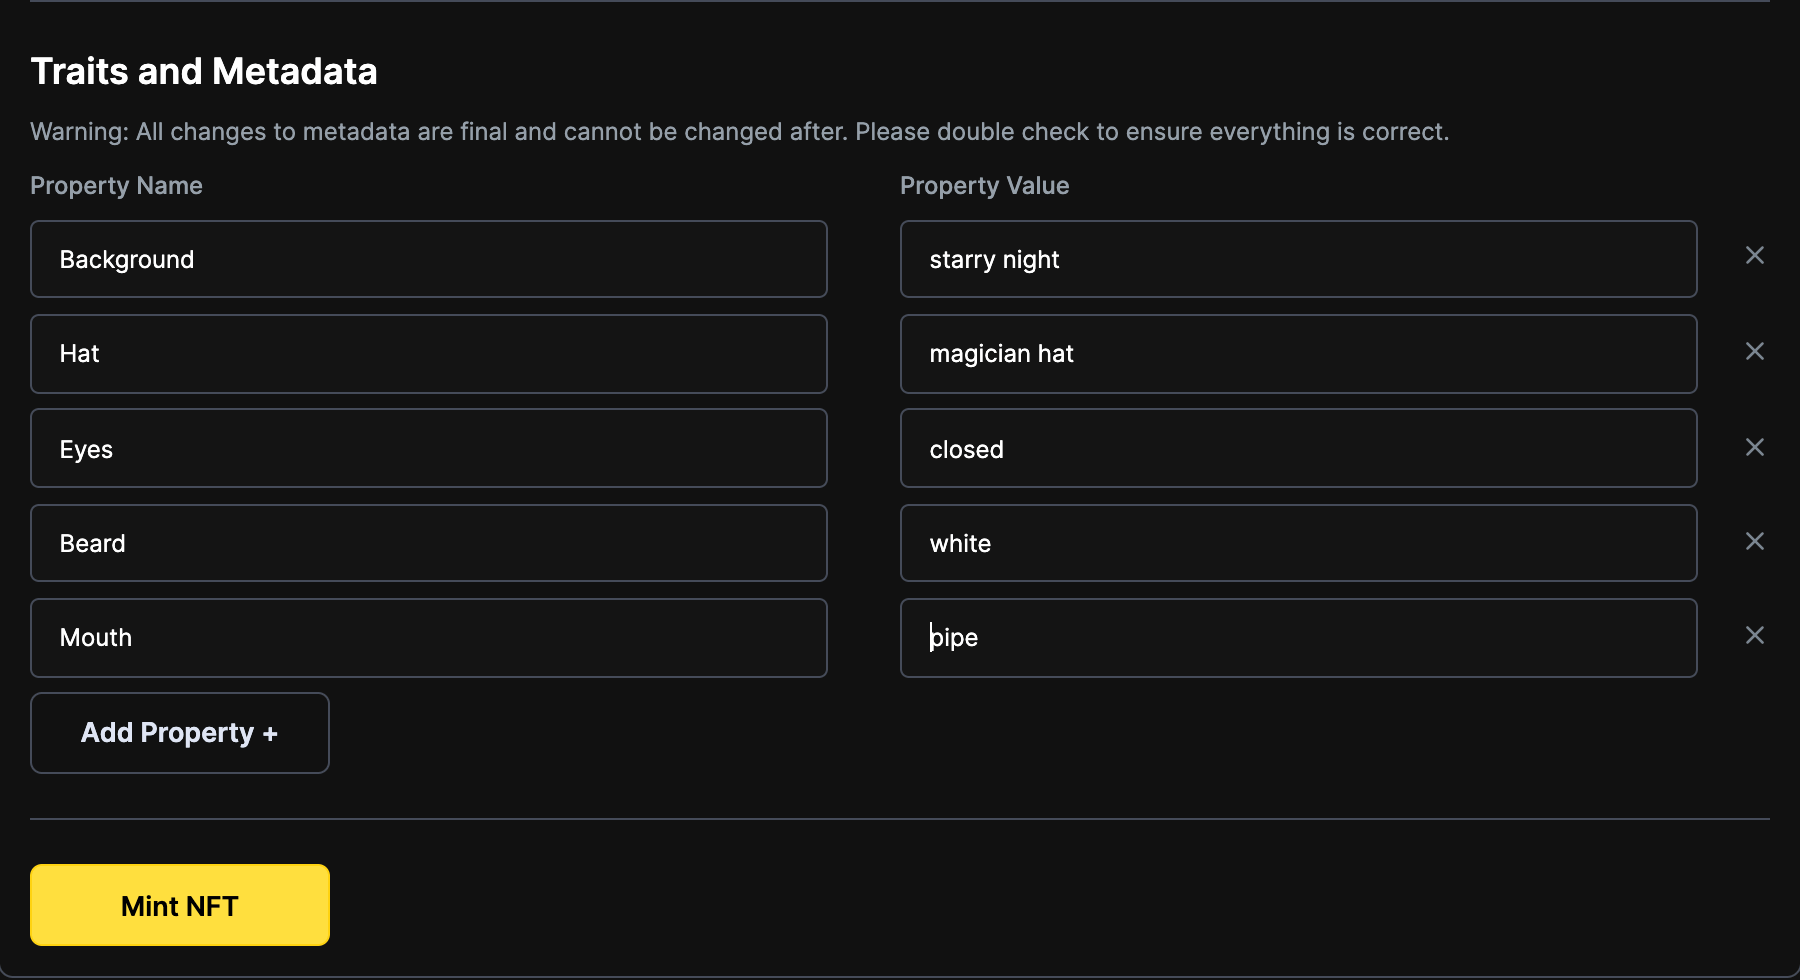
JPG, JPEG, PNG, GIF, and WEBP file formats are all accepted. Enter your NFTs name and number in the collection and add a description if you wish to.\
Below that section, you’ll see the area where you can enter the custom metadata attributes for your NFT. Ensure that the information you put in here is 100% correct, **as once you mint your NFT you will be unable to change it.**\
\
****When you’ve double-checked that everything looks good, **click on ‘Mint NFT.’**\
\
******Enter your wallet’s spending password and click ‘Sign.’**\
\
****Congratulations on minting your first NFT!\
\
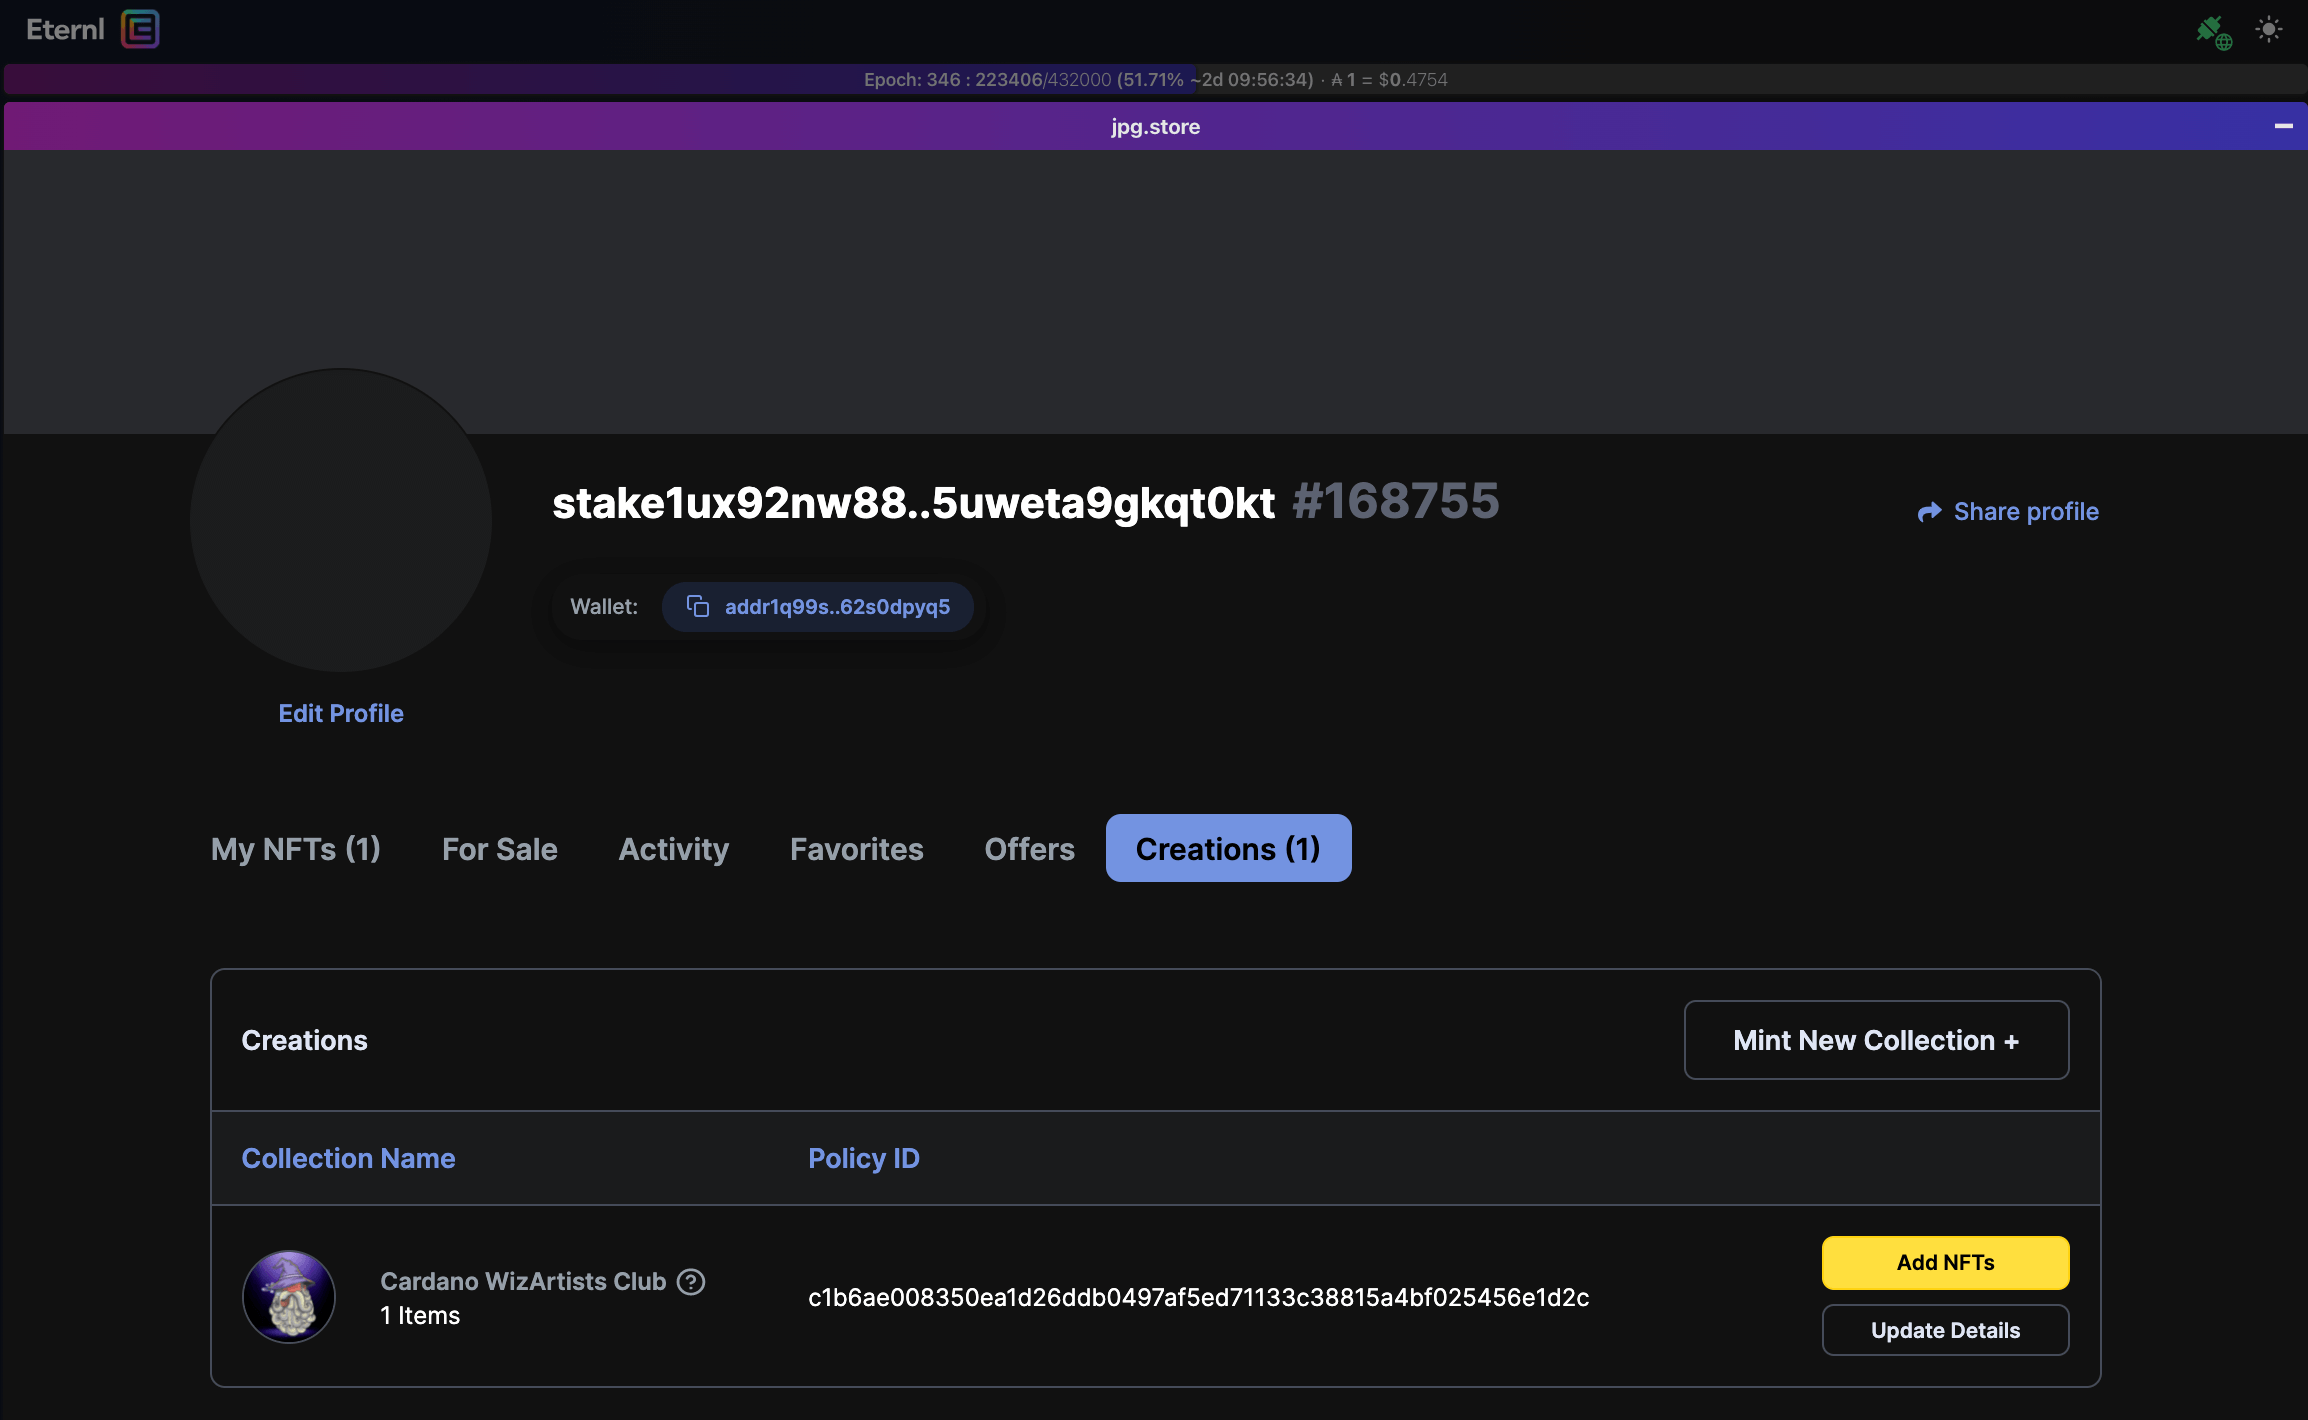
**Click ‘Done’** to visit your artist profile.\
From this dashboard, you can edit your artist profile, mint new collections, add NFTs to your existing collection or update some of the collection’s details. Your profile is accessible by moving your cursor over your ADA balance next to the Eternl logo on the top right-hand side of your screen.\
\
For now, **click ‘My NFTs’and click the NFT image you just minted**.\
On this screen, you’ll see your collection’s policy ID, the asset’s ID, its custom properties, and other sales analytics. Before we go into listing your NFT for sale and marketing it, let’s take a quick look at where you can view it.